Do you want to learn how to photoshop nudes? Then this guide is what you are looking for, as it reveals all the secrets of professional nude photo retouching. Read the tips below and you will find out several really great techniques (often used by experienced retouchers) to take your nude photography to a more professional level.
1. Remove Bra Straps
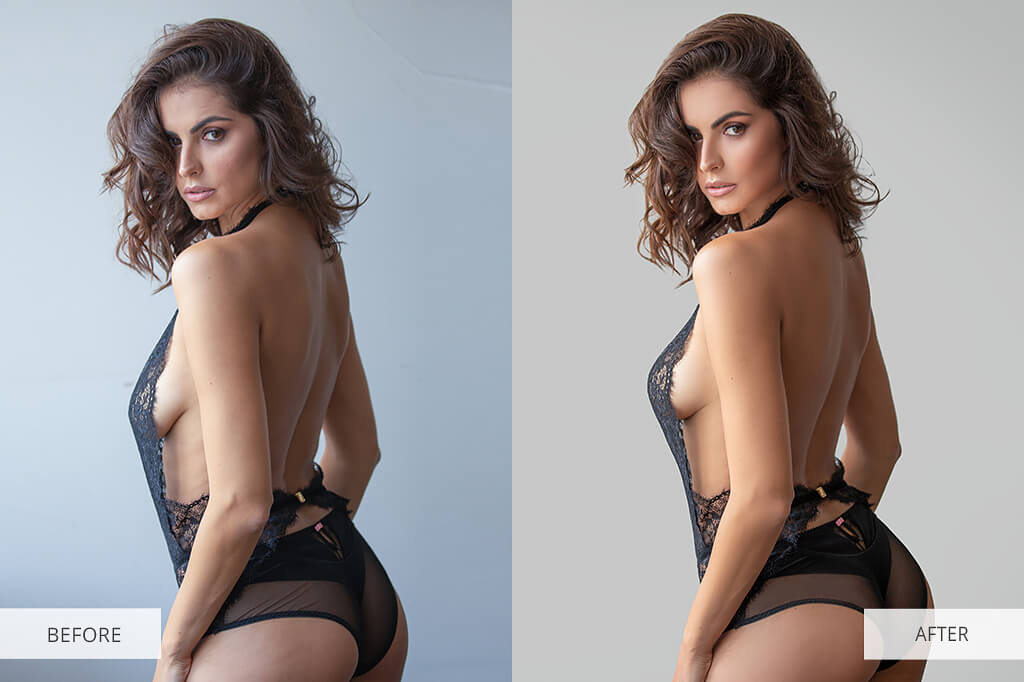
Nude photography is quite a delicate genre as it requires paying much attention to details. A bra strap hanging out is probably not what you expect to see in a professional photo. It can be very distracting, and ruin the photo's composition.
Besides, it's a great way to take captivating nude photos, without your model getting undressed. Perfect method, if you are working with shy models.
Our advice is to use the Spot Healing Brush Tool to cope with the task. Adobe has the "Content Aware" Option for identifying possible Backgrounds for areas you need to patch over. However, this kind of job is not as easy as it may seem to you, and an inexperienced user is unlikely to achieve impressive results. That is why we recommend you to turn to professional services like
FixThePhoto.
Quick Tip: Prefer the Healing Brush to the Spot Healing Brush for editing a large area or for achieving overall control of the source sampling.
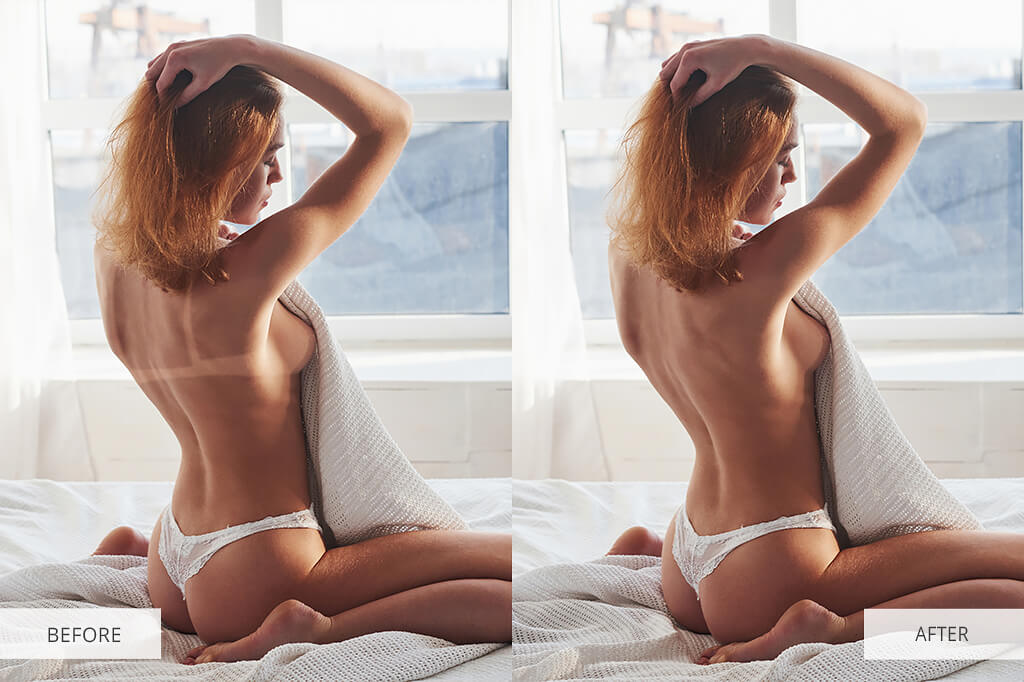
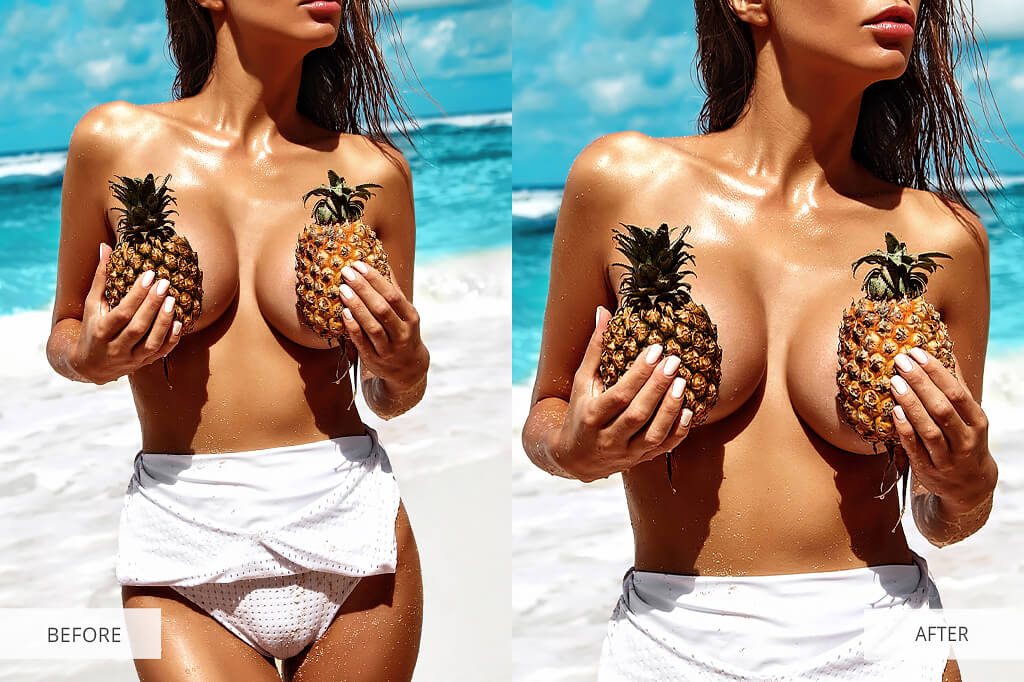
2. Remove Tan/Sunburn Lines
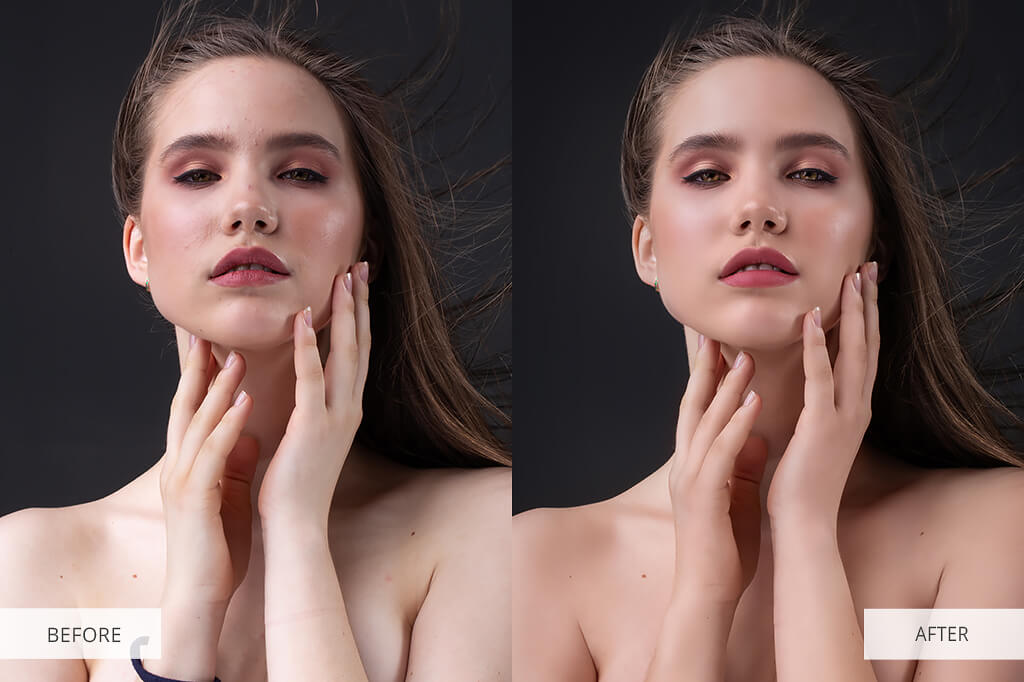
Removing tan or sunburn lines is probably one of the most difficult tasks, even for professional retouchers. These undesirable effects can spoil any nude photo and are completely unacceptable in a
fine art nude photography, as the images of this genre should look natural and tan-free.
By removing the sunburn lines, you will make a photo look more appealing and harmonious. You can get rid of these undesirable effects with the help of the Healing brush. So, you need to sample the tone of the skin you want by pressing the Alt key, click on the desirable ton, and paint it onto the area that should be fixed. This process is quite easy and won't take you much time.
Quick Tip: Use the Healing Brush on "Darken" mode. This results in skin darkening and color shift with textures preserved.
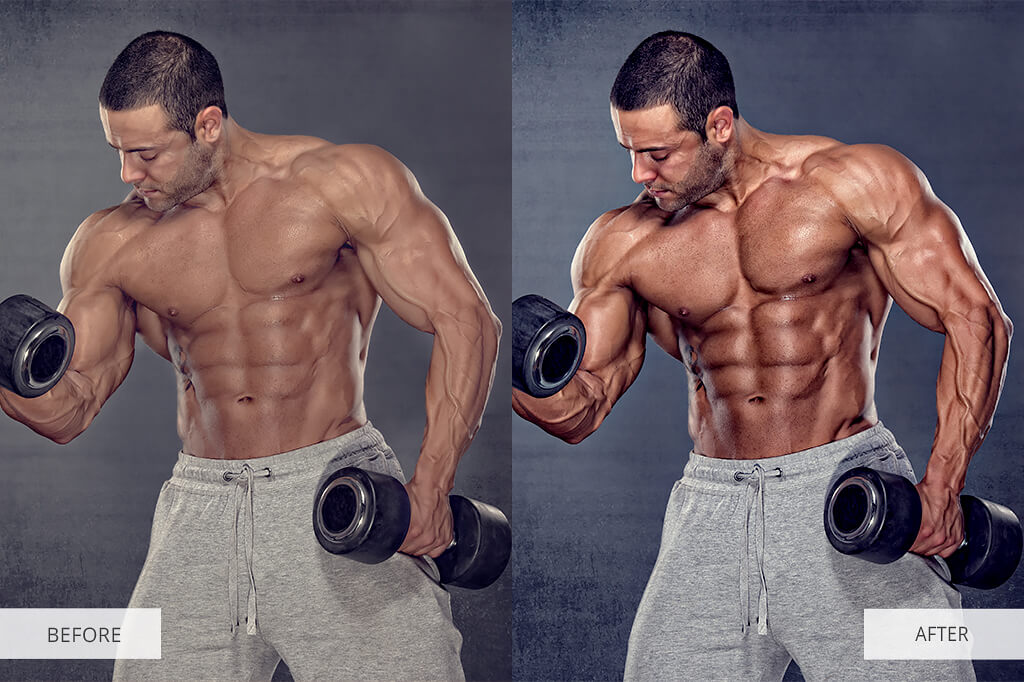
3. Highlight the Muscles with The Dodge and Burn Tool
If you are learning how to photoshop nudes, you have to master the Dodge and Burn techniques. These tools are great for adjusting the light and shadows on the subject, while providing a better understanding of 3D and 2D pictures. You can also use the layer mask and brushes to adjust the exposure in some particular sectors.
This technique is especially effective if you are actively involved in
nude photography that concentrates on a model's form and body. If you want to apply the Dodge and Burn technique, you need to use a brush and move it over the photo several times until you get the desired effect.
Besides, you can work with shadows, highlights, and mid-tones by using Dodge and Burn tools. To avoid shifting and bleaching colors, as well as prevent quality deterioration, you should use the Protecting Tones feature.
Quick Tip: We advise you to work with 5-20% exposure and create the effect you want step by step.
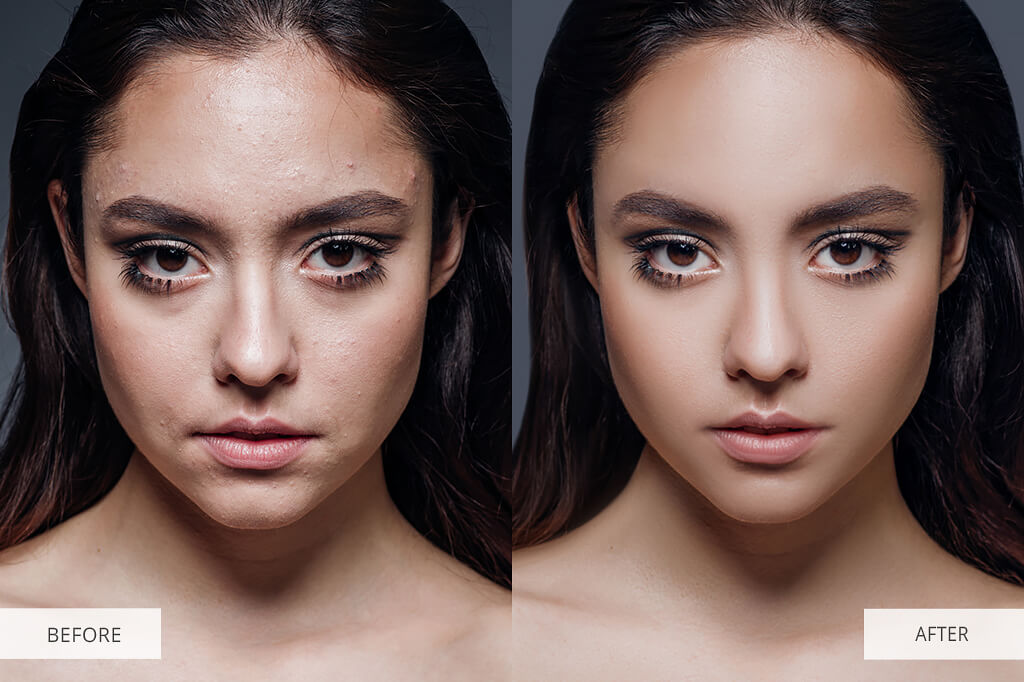
4. Retouch Skin with Frequency Separation
You can't do without the Frequency Separation technique when you photoshop nude photos. High Frequencies refer to the fine details of a picture like hair, skin texture and defects, fine lines, etc. Low frequencies convey the info about the color scheme of a picture.
By using the Frequency Separation technique, you can divide layers into 2 individual sections, meaning that you can edit skin texture without altering the color scheme of an image.
You can remove acne, get rid of wrinkles, and modify other minor details on a high-frequency level without worsening the colors of the image. In case the Frequency Separation technique isn't applied, the quality of the model's skin tone will be probably downgraded.
Quick Tip: We recommend you to use 6-8 pixels Gaussian Blur for close-up portraits, 3-5 pixels – for medium-size portraits, and 1-3 pixels - for full-body portraits.
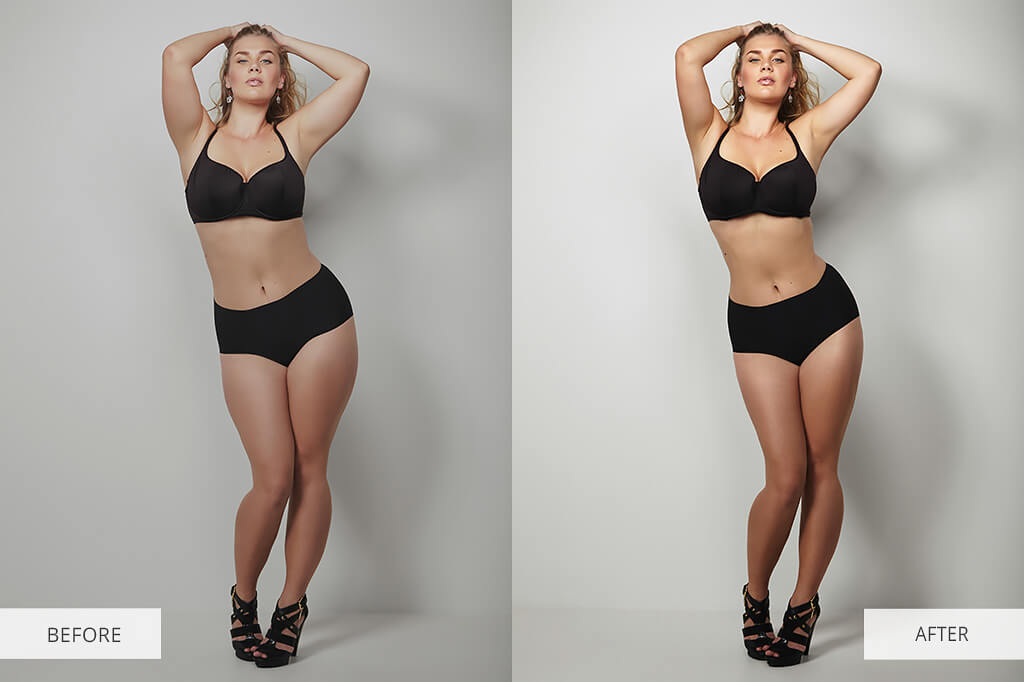
5. Enhance the Body with the Liquify Tool
Photographers argue whether the Liquify Tool can be used in nude photography. The instrument helps alter various facial features, as well as change the shape and size of the model's body. The main problem is that many photographers overdo this effect and as a result, the images look unrealistic.
This is the reason why the retouchers should be very careful with the Liquify Tool. After detecting the areas of your picture that require editing, you should change them gradually. Don't get carried away, as your task is to keep your subject natural.
To achieve the expected result, you need to choose the brush size that coincides with the area you've selected for editing. But as the practice shows, it is better to choose a bit larger brush rather than smaller brushes.
Quick Tip: Press "]" or "[" if you need to change the size of a brush.
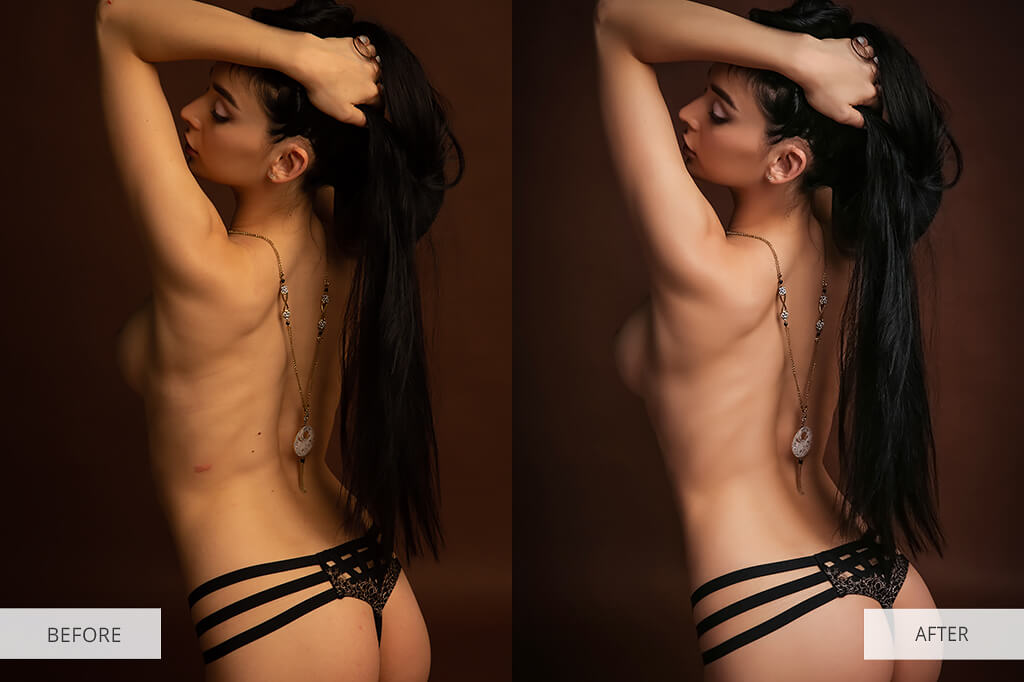
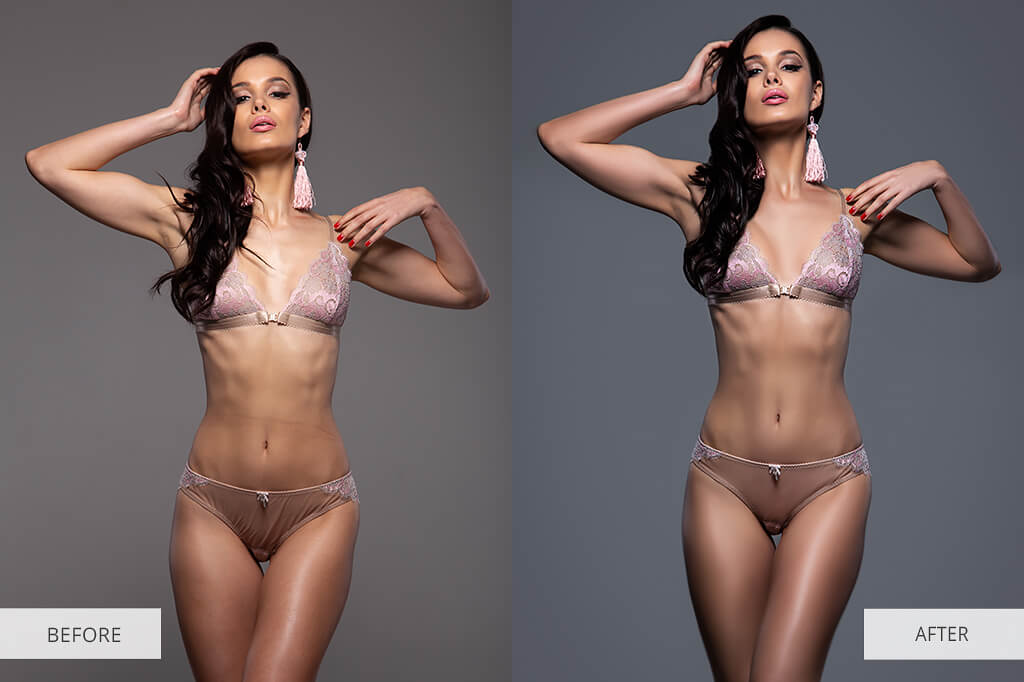
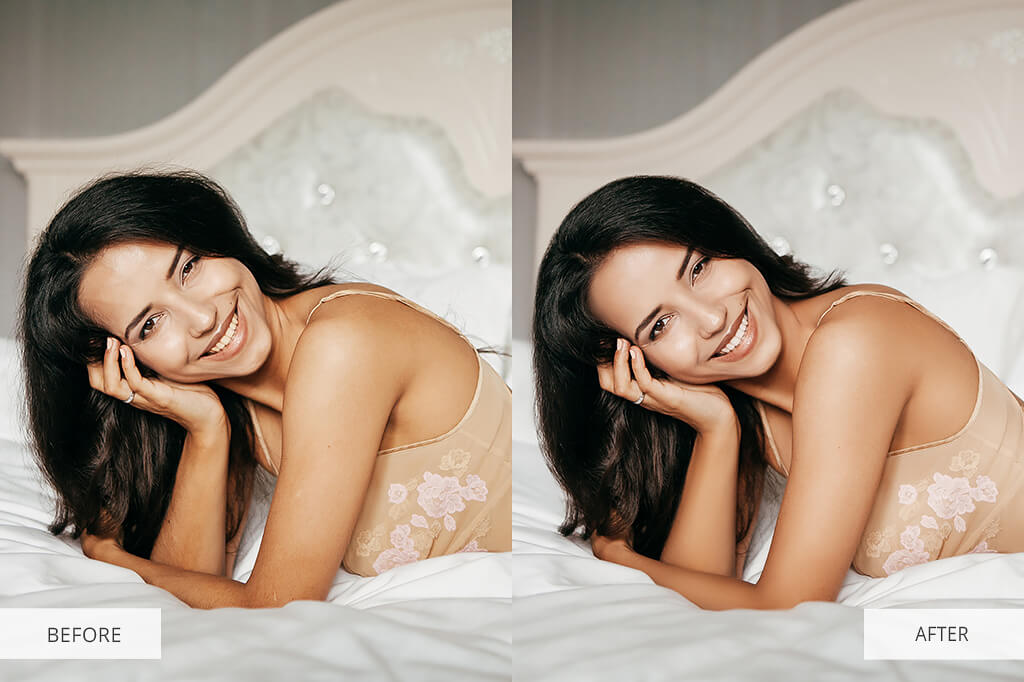
6. Match Skin Tones
Each time you photoshop nude photos, you need to find the right balance between skin tones and colors. Generally, the tone of the skin is different on various parts of a model's body. The tone of the skin may change because of make-up, light intensity during a photo-shoot, etc.
Curves is one of the most effective tools for brightening or darkening skin. For instance, if the lower part of the body is darker, you need to brighten the legs and darken the upper part of the body to balance the tone.
Hue & Saturation is the greatest instrument for modifying the color of the selected area on the skin. When a model stands for a long time, her/his blood begins circulating more intensively in legs and hands that is why they look darker and reddish. Arms and a face contrast with these body parts and look too pale. In this case, you can use the hue/saturation tool to reduce redness and adjust saturation of the skin tone.
Quick Tip: By decreasing the opacity, you can make your edits look more realistic and captivating. Our recommendation is to choose 80% opacity.
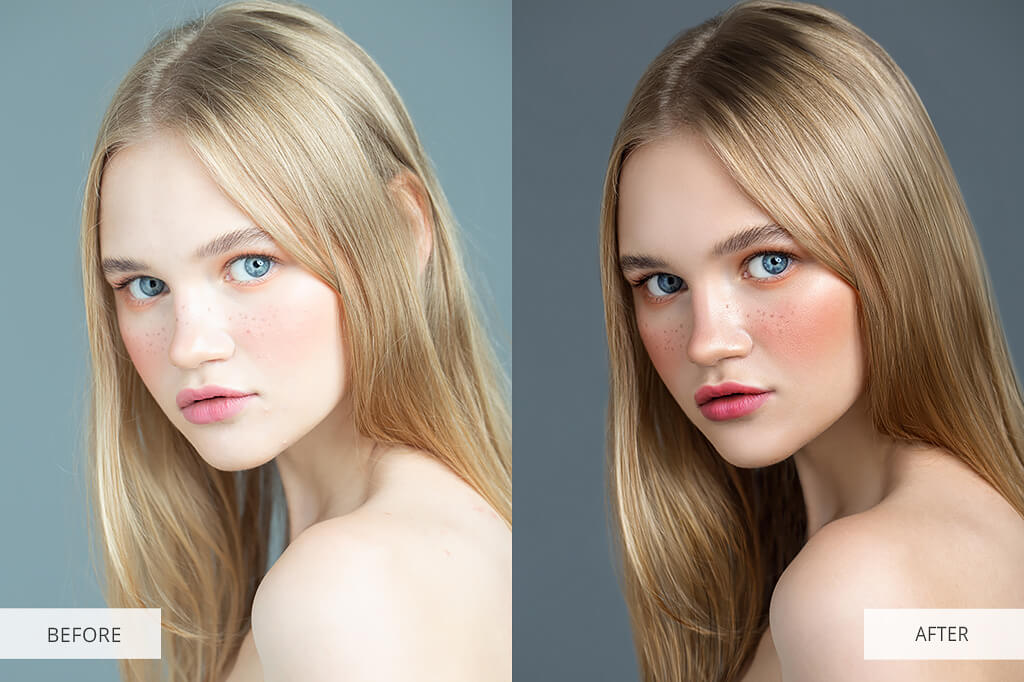
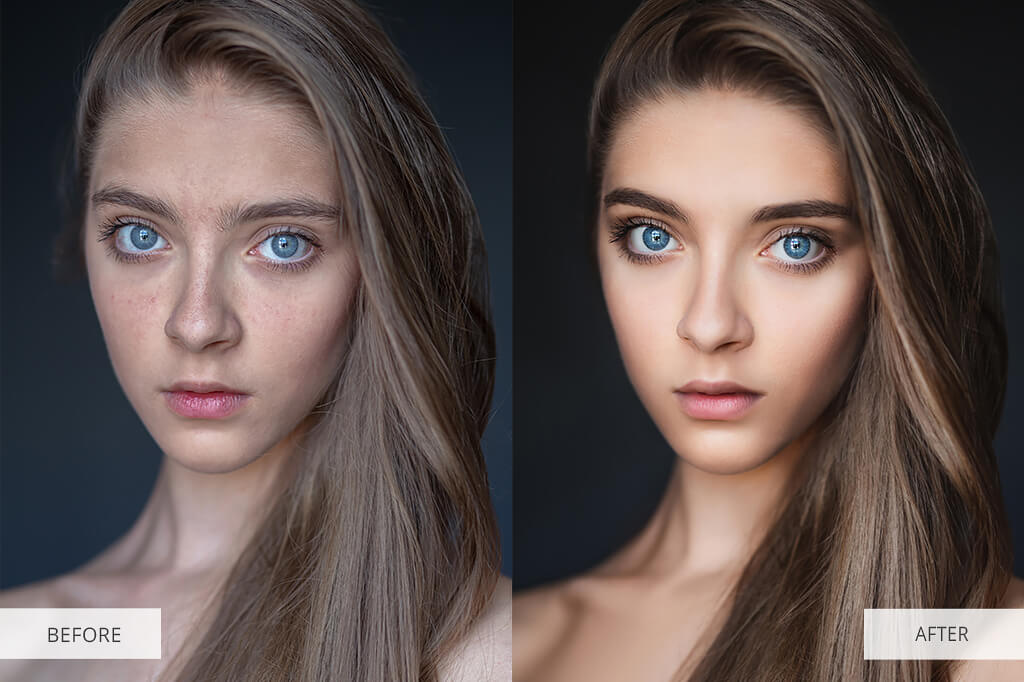
7. Get Rid of Skin Markings
The longer you edit a photo, the clearer it becomes what you need to remove or modify. Try to keep the natural look of your model by retaining some freckles or birthmarks if they don't distract viewers' attention.
Of course, you need to get rid of blemishes, bruises, cuts, and other undesirable marks because they spoilt the entire look. You need to define what marks are temporary (that can be removed) and what marks are permanent, as it will speed up the process of skin retouching. The more details you delete; the more work you will have to do to achieve image consistency.
Healing Brush is a great tool to get rid of bruises, cuts, and wrinkles on hair, fabrics, etc.
The Dodge and Burn tool can help to level the skin tone when the model stands too long. It is also effective for lightening bruises or darkening knees, or too bright areas like highlights.
Quick Tip: To make certain the result will be accurate, you need to press and hold the Alt/Opt key. By spinning the scroll wheel, you can quickly enlarge a particular part of the skin.
8. Remove Distracting Objects from the Background
Very often a photographer captures some unwanted objects that distract viewers' attention and distorts the message or the story behind your photos. No matter how large these things are; you can get rid of them from any background recovering the areas behind. One of the most effective and simple ways of deleting some objects from your photo is to use the Content-Aware Fill.
If the feature was of no help, use the Patch Tool to delete anything from an image. It is especially helpful for fixing large areas of a picture.
Experienced retouchers, who often photoshop nude photos, know that using the Clone Stamp Tool, you can get more control over the process. It allows you to scale, flip, rotate, and perform other manipulations.
Quick Tip: In case you use the Patch Tool, press Ctrl + Alt + Shift + E/ Shift+Cmd+Opt+E to generate a merged layer, otherwise the tool won't work properly.
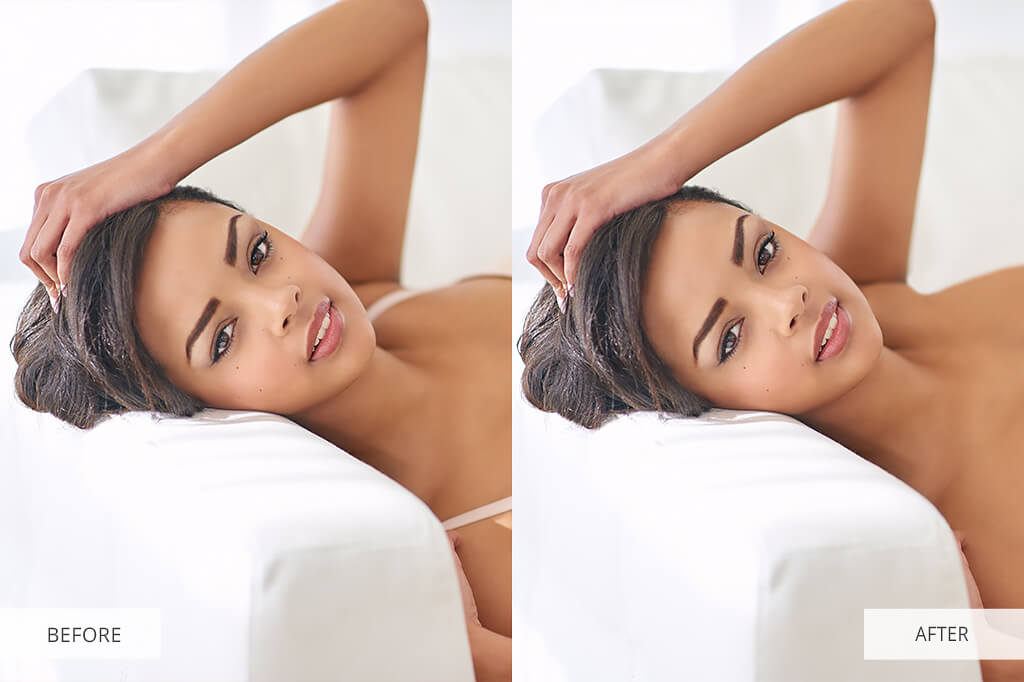
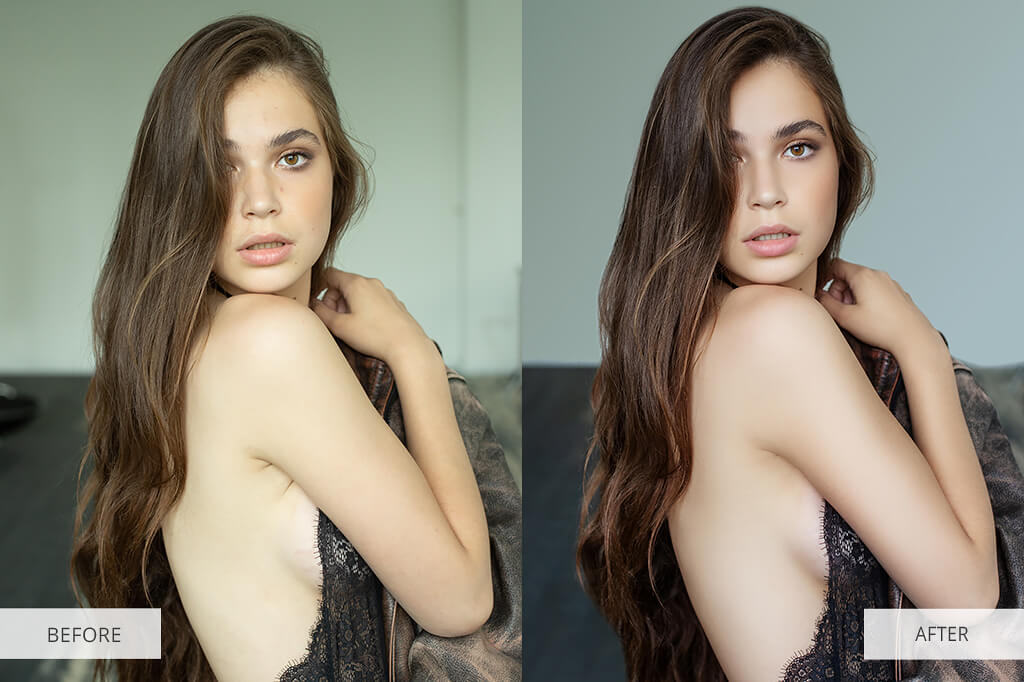
9. Retouch the Hair
Messy hair is unacceptable in a professional nude photo. Therefore, you need to get rid of stray hairs, add some volume, and enhance the overall look of hair. The clone and brush tools are indispensable for this task.
Decide on Content Aware Healing Brush Tool to remove stray hairs. To fill in the gaps, choose the Clone Stamp Tool.
While retouching hair, following the natural flow. It means that instead of sampling just once and drawing all over a crossing hair to remove stray hair, you should select the hair next to it and follow the sampled hair removing problematic pieces one by one.
Quick Tip: While using Content Aware Healing Brush Tool, you need to create a new level and select the "Sample All Layers" option.
10. Whiten the Teeth
There is nothing more repulsive in a nude photo than yellow teeth. Here the right lighting plays the most important role, as even a super shining smile may acquire a yellowish tint in case a photographer is taking a picture under the wrong light. To make teeth naturally white, you need to choose the HSL Layer Mask and adjust the parameters.
The main thing is to avoid going overboard.
Quick Tip: If you are editing a photo that features more than one person, you may want to improve the teeth of both models at once. But the thing is that people's teeth usually have different levels of whitening. So it is better to work on one smile at a time.
11. Enhance the Lips
Most retouchers concentrate on skin, hair, and eyes while editing photos, but the model's lips are no less important. Even professional make-up applied before a photoshoot may suffer from long hours of shooting.
The lips may look unattractive and their shape may be distorted, they can get dried, cracked, etc. To fix all these problems that can spoil close-up photos, you need to proceed with photoshop editing.
Quick Tip: By increasing the saturation level, you can add color to a model's lips. The problem of dried lips can be solved with the help of the Spot Healing Brush. Besides, you can add some glaring by using the Dodge and Burn Tool.
12. Crop the Photo
While learning how to photoshop nude images, pay special attention to the Crop tool. The right cut can have a drastic impact on the overall composition of your image. The Crop instrument will help you manipulate the viewers' perception of your art piece.
We advise you to use the Crop tool to highlight the models' poses. You need to cut out the distracting objects, without affecting the model's body. Many photographers think that image cropping is unacceptable as it can downgrade the quality of a picture. However, if you shoot RAW, the quality of your picture is unlikely to suffer.
Quick Tip: While resizing the crop border, you can fix the aspect ratio by pressing the Shift key as you move a corner handle.
13. Enhance the Eyes
Retouchers, who often photoshop nude photos, know how important it is to highlight the eyes and make them more expressive. Captivating eyes can make even the dullest close-up photos more alluring, while poorly lit eyes make an image boring and unemotional.
To edit the areas around the eyes, choose Spot Healing Brush or Clone Stamp Tool. Opt for Dodge and Burn instrument to lighten the model's eyes. To make certain that the changes look natural, you should brighten the sector opposite the catch light.
More experienced users may try to use layer masks to make the entire eye sharper. Besides, Photoshop offers a range of great options for changing the color of a model's eye, which will help achieve a more impressive effect.
Quick Tip: Make eyes sharper, using the Spot Healing Brush or Clone Stamp Tool.
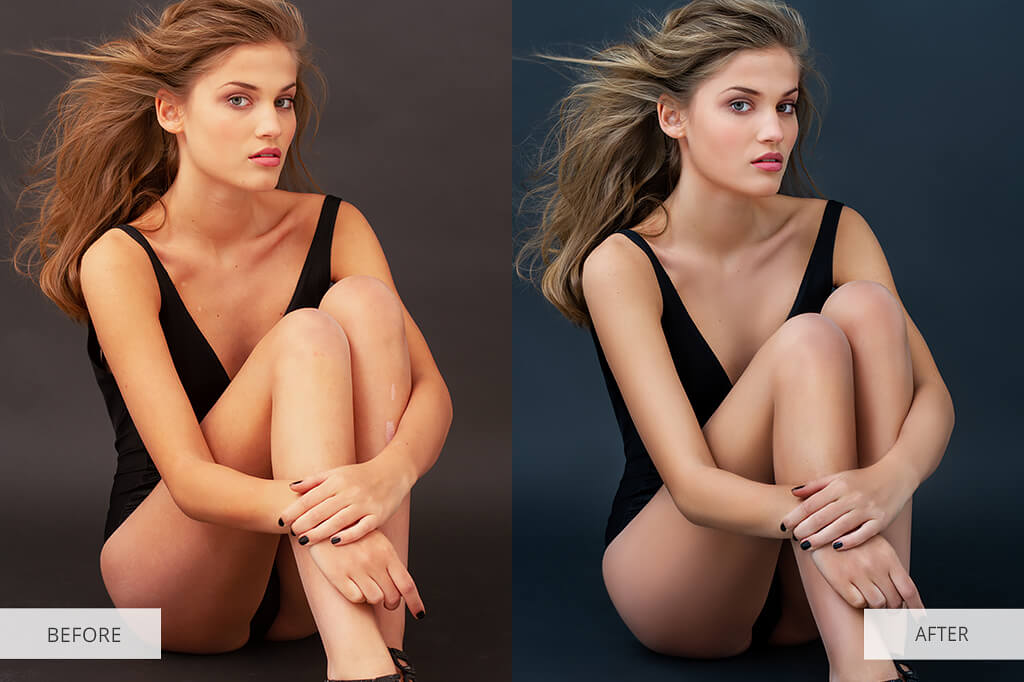
14. Correct White Balance
Getting a proper WB is quite a challenging task. Often we forget to configure the camera properly or the automatic setting of white balance may not perform adequately. However, you can easily fix white balance problems by using Photoshop.
If you take pictures indoors, you should seriously consider lighting conditions, as they may cause white balance issues. Our advice is to use the Curves Tool to improve pictures with WB-related problems. This tool will help you modify the colors of an image so that they look accurate and natural.
Quick Tip: To activate the Curves Tool, you need to press Control/Command + M keys.
15. Improve the Colors
If you want your nude photos to look vivid and bright, you should apply the color grading technique. Color is one of the most important aspects of any composition that has a great impact on the overall look of a shot.
If you are edit photos in Lightroom or Photoshop, you should go to the HSL panel to modify the color scheme of the picture. Here you can make the colors of an image richer and deeper. We recommend you to try several image editing variations.
Quick Tip: To adjust the colors of particular areas of an image, you need to hold down Ctrl-Alt-Shift/Cmd-Option-Shift and press H, S, or L.