Paper and canvas remain to be dominant mediums for many photographers, but if you want a change of pace, consider
printing your photos on metal. Printing your best shots on steel, copper, or brass can be highly satisfying as the process brings out incredible contrast and color saturation, resulting in vibrant, lifelike images. With this technique, you get a stunning piece of art that’s ideal for contemporary decor and outdoor installations. Artists like the late
Richard Culverwell, an award-winning international photographer who was based in Parry Sound, Ontario, was known for working with this material after he mastered printing on photographic paper, canvas, and glass.
In a previous conversation with ParrySound.com, the former teacher revealed that metal is his favorite medium for his famous Georgian Bay photos.
“The resolution is amazing and the etching process evokes more depth,” Culverwell explained.
“That means in a Georgian Bay picture of water and trees, all the textures are really brought out.” Indeed, photographs printed on metal provide a visual impact like no other, so if you're considering using copper, brass, steel, aluminum, or other metals for photography, here's what you need to know about different printing techniques for the best image quality.
UV Printing
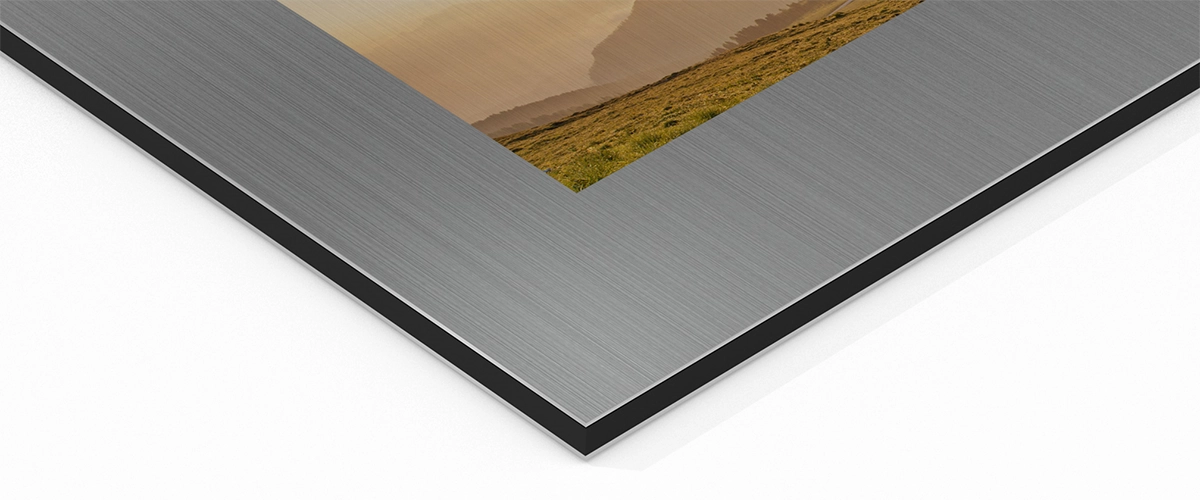
Most artists who are experimenting with metal printing often start by working with coated aluminum since it's abundant and cost-effective, perfect for those still learning new techniques. Eventually, some of them may move on to a high-grade metal like titanium, sourcing sheets from titanium suppliers as this material provides a modern and luxurious feel. Using titanium results in high-contrast images with an attractive metallic sheen, and since the metal is light and non-corrosive, this makes it the ideal material for outdoor art or public installations.
Many novice artists and photographs use the UV printing method when working with aluminum, titanium, or stainless steel since this technique allows you to directly print onto metal sheets. Aluminum, specifically ChromaLuxe aluminum, is considered to be the gold standard for metal prints since its smooth surface enhances colors and it gives a 3D effect. Stainless steel is also ideal for UV printing since it has an industrial feel that's ideal for abstract or geometric pieces. However, it doesn't absorb color as well as aluminum, so if you like subtle colors then this metal may be the perfect choice for you.
The UV printing process is fairly simple, and you start by cleaning the metal sheets and treating them with a primer to ensure that the ink adheres well. After that, you'll use a flatbed UV printer to print a copy of your digital photo onto the metal sheet. Once the ink is applied, the design is treated with a UV lamp to cure and set it, resulting in a stunning, waterproof piece that's ready to be displayed in homes, galleries, or outdoor spaces.
Photogravure or Deep Etching
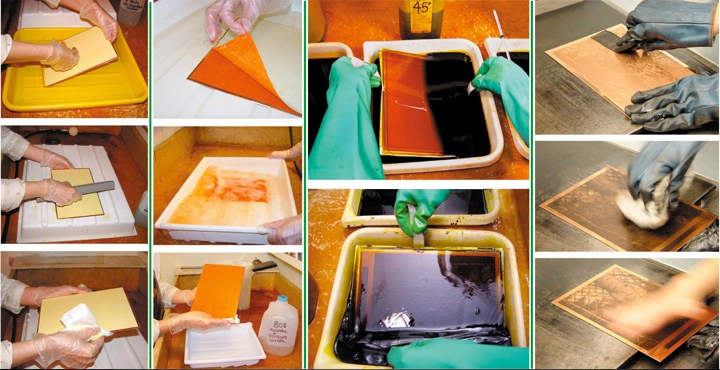
For traditional metal pieces, think about using photogravure, a traditional printing technique that produces detailed images with an artful, vintage quality. This technique has been around since the early 1800s wherein artists used early methods to etch photographs onto metal plates. Most photographers prefer to use copper for photogravure since it’s soft enough for detailed work, but it's also strong enough to withstand the pressure from the deep etching process. Using copper plates also allows artists to achieve tonal range with a single color since etching creates minuscule ink-holding lines and dots of varying depths in the metal, resulting in a print with extraordinary detail and subtle tonal gradations.
This technique is more complex than UV printing and requires patience and considerable skill, so it's perfect for photographers who want to get out of their comfort zone. Photogravure involves using a light-sensitive gelatin tissue and exposing it to a film positive. Next, the tissue is transferred to a copper plate, then it’s immersed in a hot water bath to wash the surface, leaving behind thick gelatin residue in highlight areas and less gelatin in shadowed parts of the image. The plate is then etched with ferric chloride, and the parts with less gelatin are etched deeper to hold more ink and create the illusion of depth. Once the etching is done, the metal plate is inked, then run through an etching press which will transfer the image to a piece of dampened paper. This results in a smooth image with a rich, almost 3D quality.
Dye Sublimation
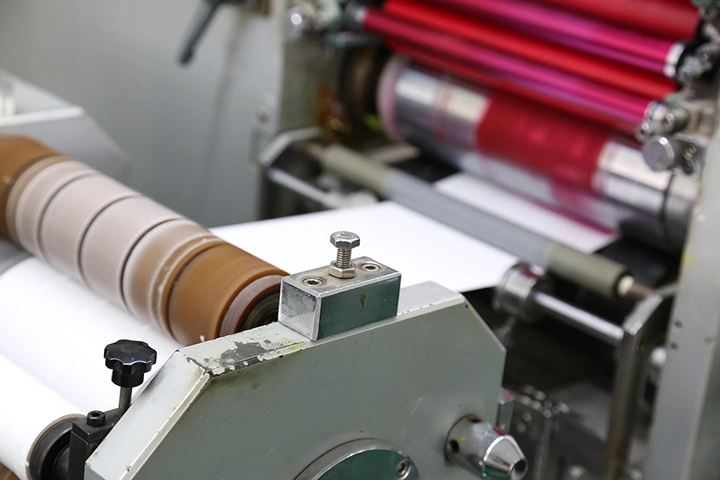
For full-color, photo quality prints, consider the dye sublimation technique to create your next masterpiece. This process requires using brass plates that are specially treated to absorb sublimation dyes, and it's versatile enough that you can use it to create everything from art works to items like plaques and name plates. You can also use this technique to start a printing business if you're thinking about making a profit from your hobby.
First, you'll need to print your design or text onto sublimation transfer paper, then turn on the heat press and let it warm up for about a minute. Wipe the brass plate so it's free of dirt and finger prints, then place the paper onto the coated side of the metal. Place the plate into the heat press, cover the design with butcher paper, then close the press and apply firm pressure. Wear protective gloves and remove the plate from the press, peel off the transfer paper, and allow it to cool.
Printing on steel surfaces allows you to work with alternative materials while enriching and refining your photography and printing skills. Try printing on brass, copper, steel, aluminum, or other types of metal to explore your creativity and develop your own unique style as an artist and photographer.